How Customers Can Change Subscription Prices with Name Your Price
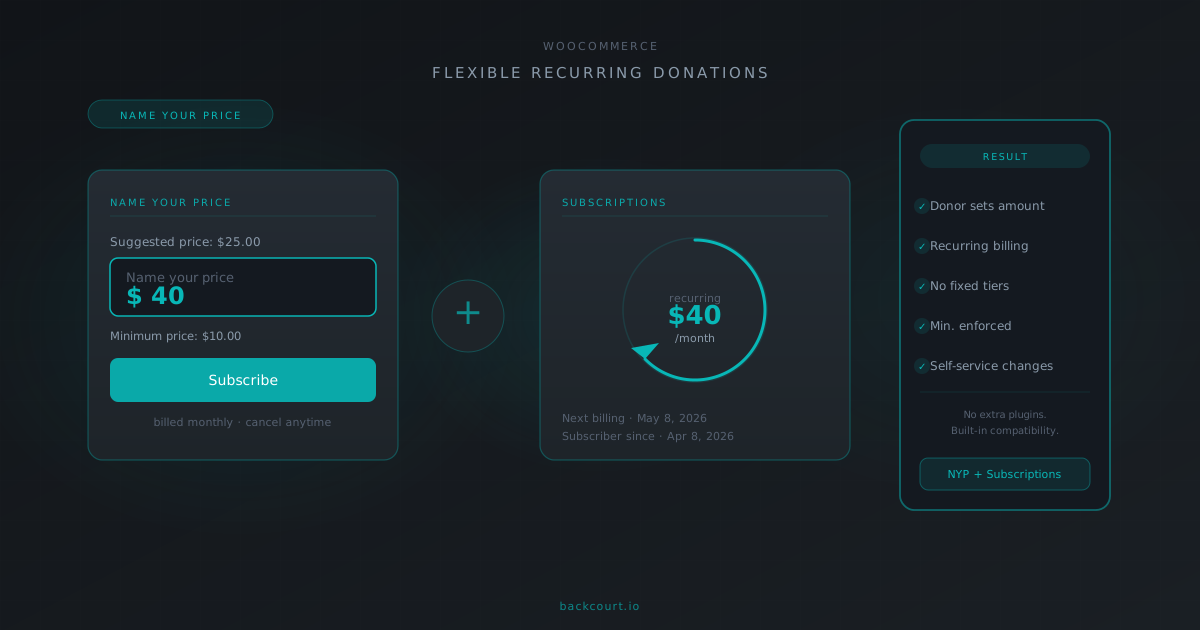
TL;DR: Flip one checkbox in WooCommerce → Settings → Subscriptions and a “Change price” button appears on every Name Your Price subscription in My Account. Subscribers go to the product page with their current price pre-filled, edit it, and the switch processes through WooCommerce Subscriptions’ standard flow. Both plugins handle the request together; no bridge plugin required.
If subscribers email asking to bump their donation up or trim their membership down, you’re probably canceling and re-subscribing them by hand. There’s a built-in option that lets them do it themselves, and it’s off by default, so most stores never find it.
After this article you’ll know which setting to flip, what subscribers see, what gets validated when they try to switch, and a couple of prerequisites that catch people out the first time.
Why self-service price changes matter
A subscriber asking to change their amount is a small signal that they’re still engaged. The friction you put in front of that request determines whether they actually update or quietly cancel.
The default path (log a ticket, you cancel the subscription, they re-subscribe at the new amount) has three problems. It puts work on you, it stretches a 30-second change into a multi-day exchange, and it briefly leaves the subscriber with nothing active. For a donation or membership product, “briefly nothing active” is when people decide they don’t need it after all.
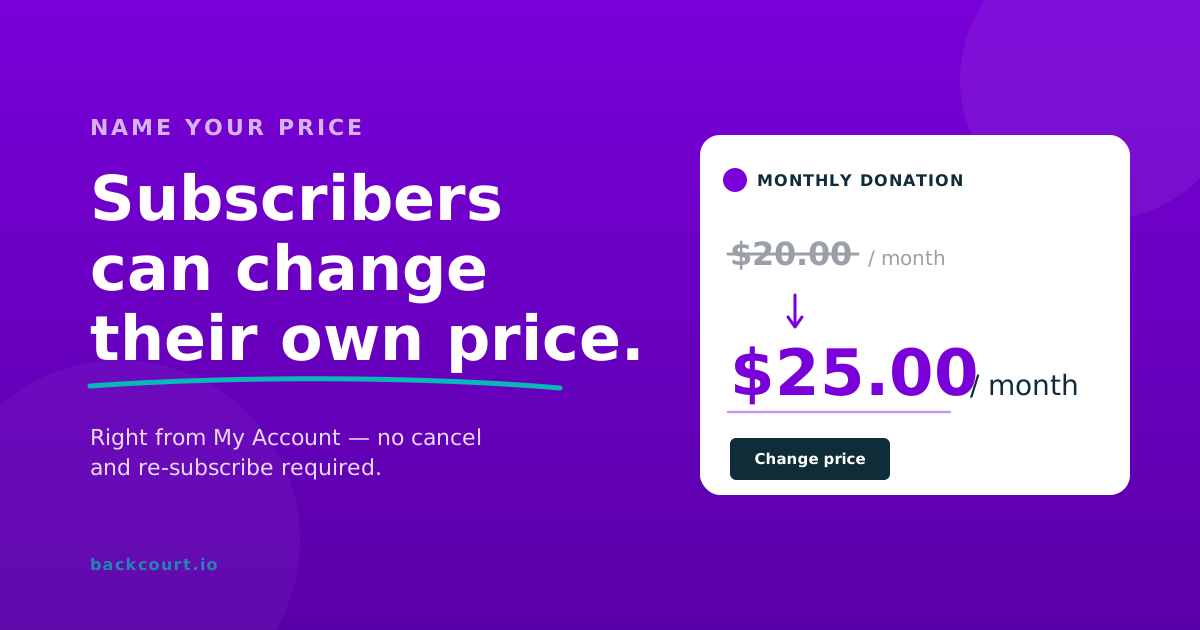
Name Your Price extends WooCommerce Subscriptions’ switching feature to cover price changes specifically. The subscriber updates the amount themselves from My Account, the subscription stays active throughout, and the new amount applies from the next billing cycle.
What the feature does
When enabled, a Change price button appears next to each Name Your Price line item on a subscriber’s My Account → View Subscription page. Clicking it takes them to the product page in “switch mode”: the price input is pre-filled with their current amount, they edit it, add to cart, and check out. WooCommerce Subscriptions records the result as a switch order and applies the new amount to the subscription.
Two settings control the experience: a master on/off toggle, and an optional customization for the button label.
Before you start
You’ll need:
- Name Your Price active
- WooCommerce Subscriptions active
- At least one live Name Your Price subscription product (see How to Accept Recurring Donations in WooCommerce with Name Your Price if you’re starting from zero)
- A payment method that supports subscription amount and date changes. Manual renewals support everything. Of the automatic gateways, Stripe and a handful of others qualify. If you’re not sure: the change-price button won’t appear for subscriptions paid through unsupported gateways, with no admin-side error to tell you why.
It also stays hidden on subscriptions without related orders yet (a freshly admin-created one, for example). One renewal or one successfully-paid parent order is enough.
Step 1: Enable the setting (~2 minutes)
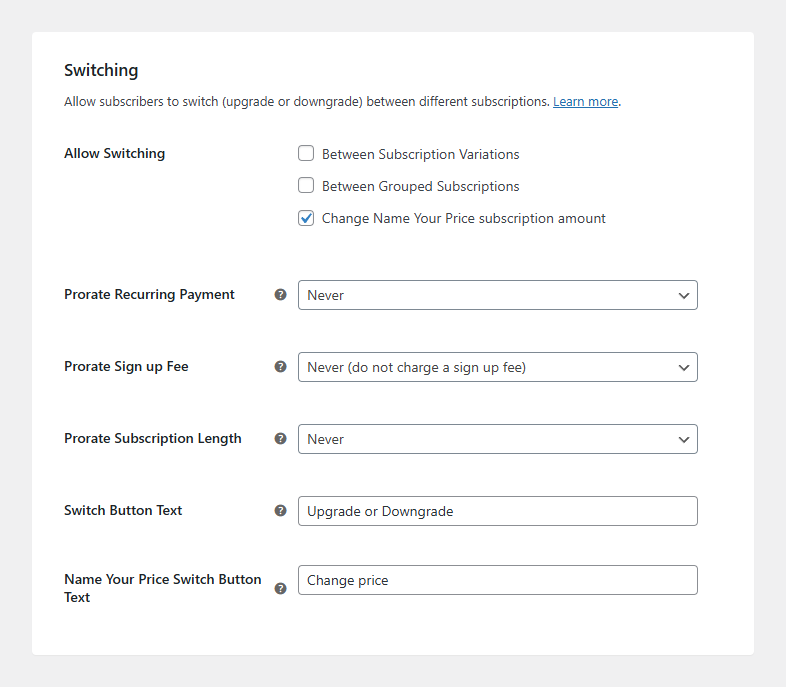
Go to WooCommerce → Settings → Subscriptions and scroll down to the Switching section.
Under Allow Switching, check Change Name Your Price subscription amount. This is the only checkbox you need for the feature itself. The other two (“Between Subscription Variations” and “Between Grouped Subscriptions”) are unrelated WooCommerce Subscriptions options for switching between variations of a variable subscription or between subscriptions in a group.
As soon as you check the box, a handful of related fields appear below it: three proration controls (Recurring Payment, Sign-up Fee, Subscription Length), a Switch Button Text field, and a Name Your Price Switch Button Text field. The proration controls belong to WooCommerce Subscriptions and apply to all switches, not only price changes. We’ll come back to those.
Click Save changes.
Step 2 (optional): Customize the button text (~1 minute)
The Name Your Price Switch Button Text field, also in the Switching section, controls what subscribers see on the action button. The default is “Change price”. The label customization only affects Name Your Price subscriptions; the regular WCS switch button has its own separate field above it.
Reach for a label that matches what the subscription represents:
- For donations: “Update donation amount” or “Change my contribution”
- For memberships with flexible pricing: “Change tier” or “Adjust membership”
- For pay-what-you-can services: “Update price”
The label appears next to every Name Your Price subscription line item in My Account.
Step 3: Walk a subscriber through the change (~5 minutes)
Worth doing once as a customer-side dry run before subscribers find it on their own.
- My Account → Subscriptions: pick an active subscription with a Name Your Price product and click View.
- On the subscription detail page, the line item now shows a Change price button next to the product name and quantity.

- Click it. You’re taken to the product page with the price input pre-filled with the existing subscription’s amount and a “Choose a new subscription” notice at the top.
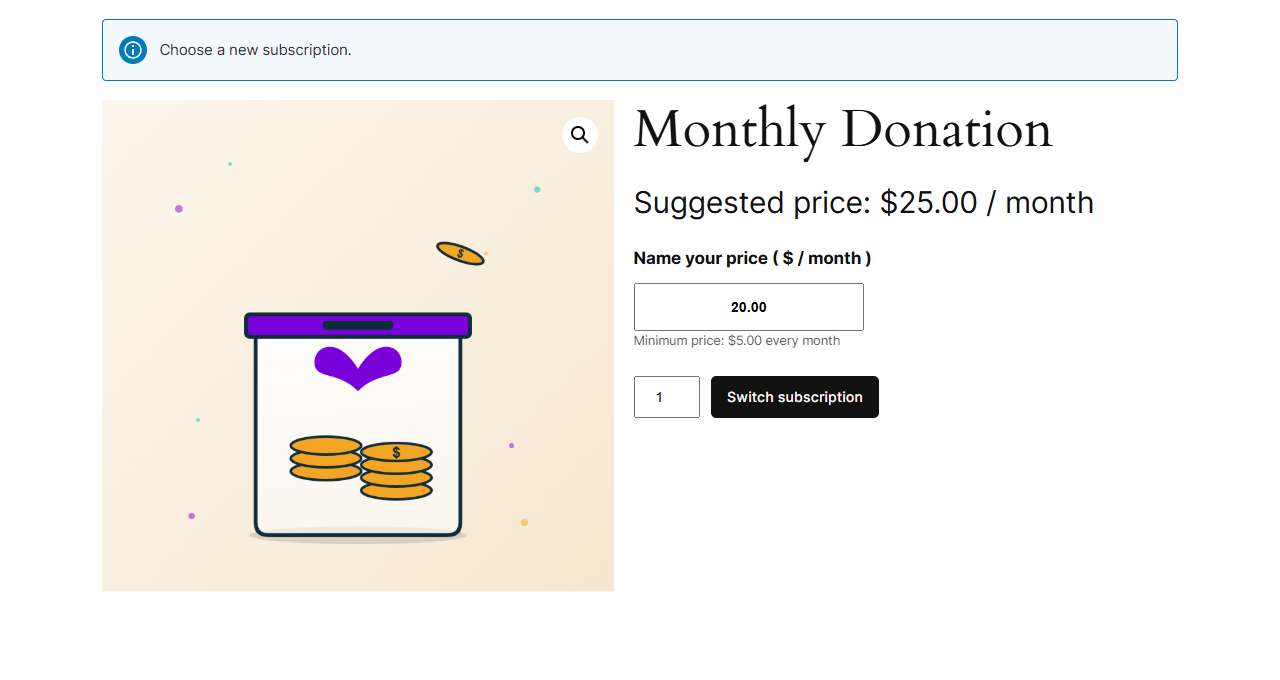
- Edit the price, click Switch subscription, and check out. The switch is recorded against the existing subscription rather than creating a new one.
Validation: what gets blocked
Three validation rules run when the subscriber submits the switch. Two of them reuse the same messages and behavior as a normal Name Your Price purchase; the third only fires on a switch.
Same price as the existing subscription. Submitted price equals the current subscription price → “Please modify the price so that it is not the same as your existing subscription.” This guards against accidental redundant switches.
Below the configured minimum. Submitted price is less than the product’s Minimum Price → “Please enter at least $X.XX.” (or “Please enter a higher amount.” if the minimum is hidden from the frontend). The price input also gets a red error border.
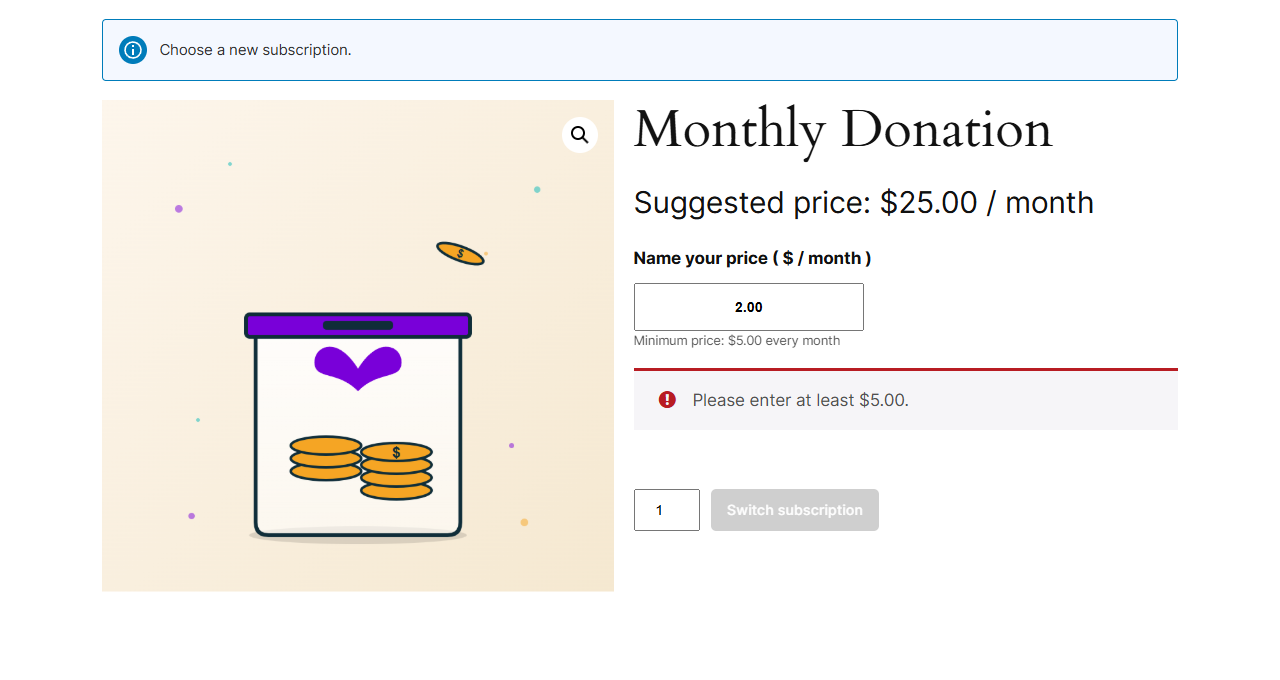
Above the configured maximum. If you’ve set one, submitting above it produces “Please enter less than or equal to $X.XX.”
In all three cases the form blocks the submission, the subscriber stays on the same page, and the existing subscription continues unchanged until the subscriber corrects the input.
Proration and billing: WooCommerce Subscriptions’ job, not Name Your Price’s
This is the part that surprises people the first time. Name Your Price captures the new price and hands the switch off to WooCommerce Subscriptions. All proration and billing-timing behavior comes from WCS’s switching settings, not from Name Your Price. That includes whether the subscriber is charged the difference immediately, gets a credit, or sees the new amount on next renewal.
Those three dropdowns the NYP checkbox revealed:
- Prorate Recurring Payment: applies a credit/charge for the unused portion of the current period when the amount changes
- Prorate Sign-up Fee: only relevant if the product has a sign-up fee
- Prorate Subscription Length: only relevant for fixed-length subscriptions
Defaults are all “Never”, which means: no immediate proration, no extra charge, the new amount applies starting from the next renewal. That’s usually the right behavior for a donation or membership use case. If you want immediate proration, set Prorate Recurring Payment to Virtual (prorate only digital/virtual products) or All depending on what you sell.
The detailed semantics for each option are documented in the WooCommerce Subscriptions switching guide. Worth a read if you’re configuring this for a paid plan rather than a donation, because the proration behavior is what subscribers actually feel.
Variable Billing Period: same switch, more knobs
If the product also has Variable Billing Period enabled (an NYP feature that lets the customer choose their own billing frequency on top of the price), the switch link carries the existing period as well as the existing price. Subscribers can change either one or both in a single switch.
When the period changes, Name Your Price recalculates the subscription length to keep coverage roughly equivalent on an annualized basis. A 12-month “1 per month” subscription becomes a 1-month “1 per year” subscription if the subscriber switches monthly-to-yearly. They get the same total duration of coverage, bundled differently.
Variable Billing Period deserves its own walkthrough. We’ll cover it in a dedicated guide. [link to be added on publish]
Frequently Asked Questions
Can WooCommerce subscribers change their own subscription price?
Yes, with the right two plugins. Name Your Price plus WooCommerce Subscriptions adds a “Change price” button to each Name Your Price subscription on the customer’s My Account page. Enable Change Name Your Price subscription amount in WooCommerce → Settings → Subscriptions to switch it on.
Does this work without WooCommerce Subscriptions?
No. The switching infrastructure lives in WooCommerce Subscriptions. Name Your Price extends it to cover price changes specifically, but you need both plugins active.
Why isn’t the “Change price” button showing on my test subscription?
Three things need to be true: the setting is enabled, the subscription is active, and the subscription has at least one related order. A subscription you created manually in the admin starts with no related orders attached, which fails the third check. Run the “Create pending parent order” action and mark that order Processing (or wait for the first real renewal) and the button will appear.
There’s a fourth gate that catches some stores: the subscription’s payment method must support both amount changes and date changes. Manual renewals support everything; Stripe does; many other gateways do not. If your subscribers are paying through a gateway that doesn’t, the button silently fails to render. There’s no admin warning.
Will the new price be prorated or charged immediately?
That’s controlled by WooCommerce Subscriptions’ three proration settings (Prorate Recurring Payment, Prorate Sign-up Fee, Prorate Subscription Length), not by Name Your Price. The defaults are all “Never”, which means the new amount applies starting at the next renewal with no immediate charge or refund. Change those if you want different behavior. The settings apply to all switches, not only NYP price changes.
Can subscribers go below the minimum price?
No. Name Your Price enforces the product’s Minimum Price on switches the same way it does on purchases. Below-minimum submissions fail with “Please enter at least $X.XX.” inline and the form refuses to submit.
What happens if a subscriber submits the same price they already have?
They see this error: “Please modify the price so that it is not the same as your existing subscription.” It guards against accidental no-op switches that would otherwise create a confusing audit trail.
Does this work for variable subscription products?
Yes for the price change. For variation switching (moving between variations of a variable subscription), that’s controlled by a separate WCS checkbox in the same Switching section (“Between Subscription Variations”) and is independent of the Name Your Price feature.
Will my subscribers’ existing coupons still apply after they switch?
Whatever coupons were attached to the subscription remain in place. The switch reuses the existing subscription record rather than creating a new one, so any coupons applied at sign-up carry over. The specifics of how a switch affects recurring discounts depend on WCS’s behavior. Refer to the WooCommerce Subscriptions switching guide if your store uses coupons heavily.
What’s Next?
- How to Accept Recurring Donations in WooCommerce with Name Your Price: the foundation guide for setting up NYP subscriptions in the first place.
- Setting Up Name Your Price: Minimum, Maximum, and Suggested Prices Explained: how the price-input fields work. The same rules apply when a subscriber switches.
Name Your Price is available at woocommerce.com. If a subscription behaves differently from what this guide describes, our support team is one ticket away.